Did you know that you could use Gmail and your own domain name to send and receive emails without paying a dime? 🤯
— So you’re telling me that I will be able to use an email address that looks professional and stop leaving an empty brand card every time I’m contacting a customer?

That’s exactly what I’m saying and the process is so simple that you’re gonna find that article so freaking short…
The services we are going to use:
- ImprovMX
- Gmail
- The DNS management tool provided by your domain name registrar. Mine is located at Netlify.
Let’s do it
Create our new aliases with ImprovMX
- Go to the ImprovMX home page and create a free alias
- Follow the tutorial they provide (they make it so clear… that it would be a loss of time to restate 😇) to add the new MX records.
- Use this link to manage and see the state of your aliases on ImprovMX.
- You might have to wait some minutes to hours before the DNS changes are fully propagated… The result you want to see is that one:

When you see the “Email forwarding active” green message, click on the “TEST” button and look at your Gmail mailbox and wait for the mail to arrive.
You’re are now able to receive emails from your custom domain name 🥳!
Setup Gmail to send emails with our custom domain name
- Again let’s follow one of the wonderful guide provided by ImprovMX: Sending emails using Gmail SMTP.
- Once done, you should be able to use your own domain to send mails.
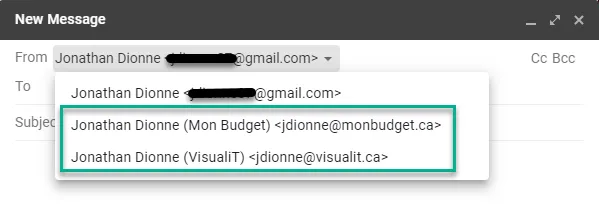
Good Job! You are now able to show off your own brand every time you send an email and, all of that, for free 🥳!
One last thing
This step is completely optional, I just want to show you how I split my professional emails from my personal ones with the use of Labels and simple Filters in Gmail.
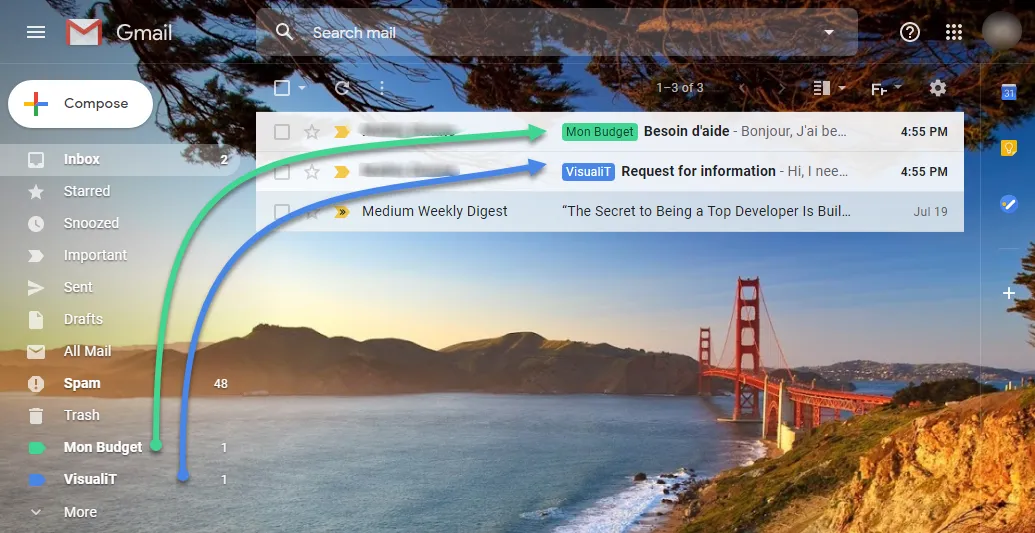
Follow the next steps if you want to replicate my setup:
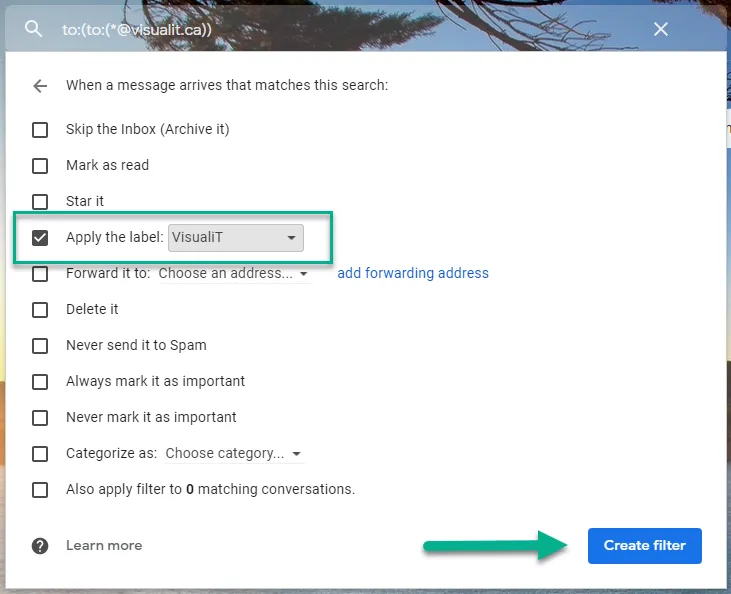
- Create a label for each alias created previously. (Adjust the colour if you wish)
- Create a new filter by pasting “to:(*@visualit.ca)” into the Gmail Search Bar (for better results… change my domain name for your own 😉)
- Click on the little arrow at the end of the Search Bar to see more criteria.
- Click on the button “Create filter”.
- On the next step, tick the option “Apply the label” and select the targeted label.
- Click on “Create filter”
For those who need some visual support: